Last night, I finished something that's been in my bag for two years.
The project was a quilt made from my son's baby clothes. I came up with the idea when he was about 18 months old, and arbitrarily decided that it would include clothing up to when he turned 2. So, I had to wait for him to outgrow things - and he took his sweet time doing that. Then I lent some of his things to a friend who'd had a wee boy, and had to wait for
him to outgrow them. And then, perhaps the most time-consuming part, I had to decide what I was going to do with them. Once all this was decided, the actual quilt took no time at all - but the getting there was a looooong process.
I am a hoarder when it comes to memories. I don't want to throw anything away. So the prospect of saying goodbye to these little stained shirts, worn out trousers, tiny pockets and buttons wasn't something I was capable of doing. Likewise, though, I couldn't keep them all. By the time I devised the project I already had four shopping bags of clothes that he had outgrown, and only one small cupboard to keep them in. So, I steeled myself and one afternoon I took the scissors, the rotary cutter, and a ruthless determination and started cutting.
This was definitely the hardest part, and there were a few things I couldn't bear to chop. The very first sleeper he wore is still intact, and a few other tiny vests and knitted things. But the stack of squares took up one (Clarks size 4 creepers) small shoe box instead of half a closet, and once I started there was no going back.
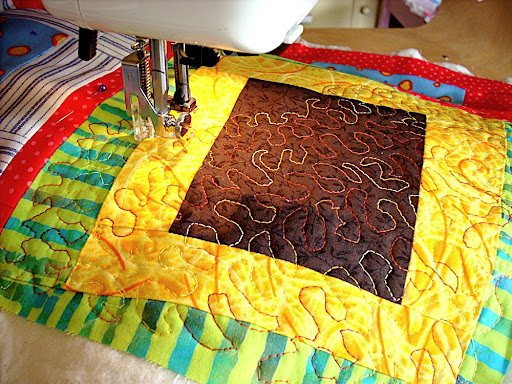
One of the biggest obstacles I faced was the fact that almost all of his precious clothes were made from stretchy, t-shirt material. Serious quilters will tell you that you CANNOT quilt with this. Less serious quilters will sacrifice perfection and do it anyway. More about how to do this below.
Now the two years of planning, saving and cutting means this isn't really a project that can be made in a nap. However, it can easily be broken up into nappable-sized chunks, which is largely how I got it done. Depending on how quickly you work, this is probably a week's worth of naps - maybe a bit more if your handsewing is a bit rusty.
Before we get to the step by step, a few tips learned along the way:
1. Cut your squares a good few inches larger than you actually want them to be.
2. Try and get pockets, buttons, details, and prints in - but avoid having anything bulky (snaps, thick seams) at the edge of your squares.
3. It doesn't have to be a complete archive. If there's something you can't bear to cut, don't.
My finished quilt used 63 squares, each 5 inches when finished. You can adapt as needed!
You will need:
-a rotary cutter and mat (not absolutely essential, but they will make your life easier)
-a quilting ruler
-iron-on stabiliser. I have no idea what brand I got, and there are a lot of varieties, but you want something very lightweight that will make stretchy stuff not stretchy. Ask your friendly fabric shop, or search on
The Cotton Patch website for stabilisers (
like these). You can even get super fancy ones that wash away when you first launder your quilt, meaning that the slight stiffness you get from a stabiliser vanishes. I didn't go for this option, simply because of the cost, but feel free!
-100% cotton thread, suitable for machine quilting (NOT hand quilting)
-a stack of baby clothes to make 63 fabric squares
-fabric for the sashing (on mine, that's the white cotton that frames each square)
-an iron
-a sewing machine
A note on fabrics. I like cotton, and I particularly like brushed cotton. Flannel is also lovely. You don't want anything too heavy and bulky, but otherwise there are no real rules. It helps if you like it and like sewing with it!
Step 1: making your squares
Assemble your baby clothes and your nerves and start cutting. At this point, cut out the squares larger than you actually want them to be: you won't trim them down to their proper size until they've been stabilised. For my quilt, I cut out 6 inch squares.
Once you have a stack of squares, you need to iron-on the stabiliser. Do this according to the instructions on the brand you've bought. Now you're ready to trim them down and make them into nice, neat squares of the size you want.
The finished size of the squares in my quilt is 5 inches, in order to incorporate some of the larger designs in the fabric. Whatever size square you want, make sure you add half an inch to allow for seams. So, for my 5 inch squares I cut out 5 1/2 inch squares.
Step 2: making your sashing
Sashing is the white stripes that surround each of the patchwork squares in my quilt. I wanted a finished border of 1 1/2 inches, so again allowing for seams I cut strips that were 2 inches wide. You want 6 long strips (to go between the columns), 56 5 1/2 inch strips, and enough white for a border all around your quilt.
Step 3: lay out the quilt
Get a big piece of floor and lay out your pieces how you want them to go. My quilt is 7 squares across x 9 squares down. Arrange to your hearts desire.
Step 4: start sewing
*** ALWAYS use a 1/4 inch seam allowance ***
Sew your squares together in columns, adding a piece of 5 1/2 sashing between each square. You should end up with a long, narrow panel of 9 squares, divided by bits of white. You want seven of these. Turn them over and press the seams open flat.
Once you have your 7 columns, you need to add a long strip of white between them and sew them all together. Then, when you have a big rectangle, add your white border. First, cut two white pieces to go across the top and bottom of your quilt, and then once they are sewn on add the borders down the sides.
Remember to press all the seams out so your quilt top is nice and neat.
Ta da! Your quilt top is finished. In the next instalment, we'll finish it off!